This post will guide you in getting FreeRTOS up and running on the Zybo Zynq 7000 development board from Digilent. The post will focus on running FreeRTOS on a single core. After a few eons i shall be putting up another post on running FreeRTOS, each on one core. The entire project has been uploaded to Git and the link is somewhere down below.
What we are going to do ?
1. Create a custom AXI4 Lite peripheral whose output port will be connected to the four LEDs on the Zybo.
2. Get FreeRTOS to run on the ZYBO.
3. Create a task in FreeRTOS to write data to the AXI peripheral and display it on the LEDs.
What we are going to do ?
1. Create a custom AXI4 Lite peripheral whose output port will be connected to the four LEDs on the Zybo.
2. Get FreeRTOS to run on the ZYBO.
3. Create a task in FreeRTOS to write data to the AXI peripheral and display it on the LEDs.
Pre-requisites:
1. The Zybo board.
2. Latest FreeRTOS source code.
3. Vivado 2014.x and Xilinx SDK 2014.x.
4. Knowledge of using the Xilinx tools.
Steps:
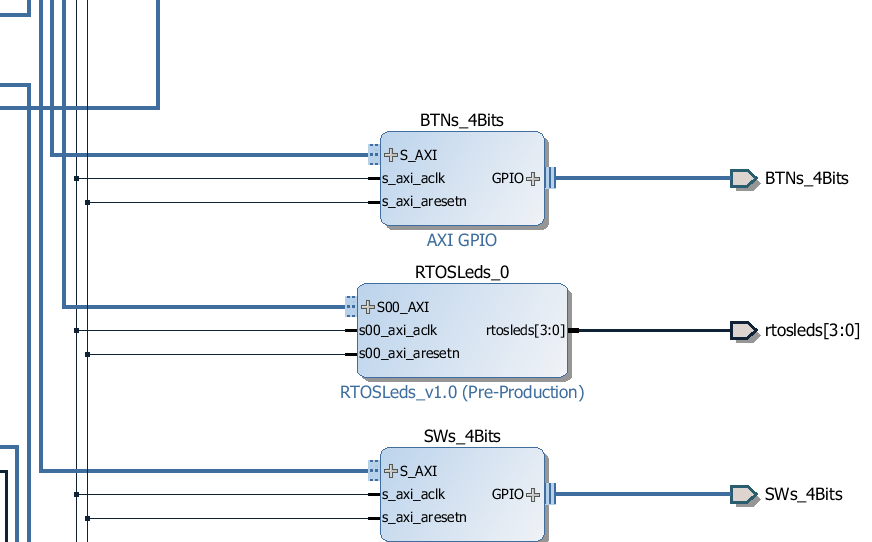
1. The first step is to build and setup the hardware in Vivado. To keep this post short i would recommend you to click here and follow the Embedded Linux Tutorial by Digilent. You only need to refer this post on how to create a AXI Lite peripheral, section 1 - Hardware Customization and generate the Bitstream. It's upto you to work in VHDL or Verilog. I know VHDL therefore i had to delete the system_wrapper, change the Project Settings and regenerate the system_wrapper and other code in VHDL. Here is my custom AXI 4 LITE peripheral - RTOSLeds_0. Make sure that you assign address to your peripheral in the Address Editor before generating the bitstream.

2. Once you've finished generating the bitstream export it and Launch the SDK.
3. Within the SDK create a new application project, preferably a blank one or the HelloWorld project.
This should generate the BSP and the hello world project files. Now since we will not be using the helloworld.c file, we can delete it. Additionally remove the helloworld reference from the Makefile (that's if you created a helloworld project instead of a empty one).
4. On the FreeRTOS website there is a page that describes porting it to the Zynq processor. You will find the same project at this path in your FreeRTOS directory - \FreeRTOSV8.2.1\FreeRTOS\Demo\CORTEX_A9_Zynq_ZC702. The platform and BSP in that folder are not for the Zybo board therefore we do not need to refer those folders at all since we have created our own hardware and bsp in the steps above.
5. The RTOSDemo folder which is our folder of interest contains the necessary files that need to be imported to our project workspace. Not all files, just a few that are highlighted below. The platform related files will already be present in the project.
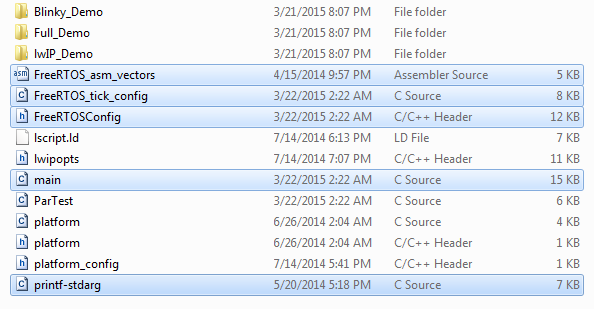
Copy the above highlighted files to the src folder of the sdk project.
6. Navigate to the - \FreeRTOSV8.2.1\FreeRTOS\Source\portable\GCC\ARM_CA9 folder and copy port.c, portASM.S and portmacro.h to the xilinx sdk src folder.
7. Navigate to the - \FreeRTOSV8.2.1\FreeRTOS\Source folder and copy all the six C files to the project.
8. Copy the FreeRTOS headers from the include directory at the same path [7] into the xilinx sdk.
9. Copy heap_4.c from the \FreeRTOSV8.2.1\FreeRTOS\Source\portable\MemMang directory into the project directory.
10. Your Xilinx SDK project src folder should now contains all the files as shown below.

6. Navigate to the - \FreeRTOSV8.2.1\FreeRTOS\Source\portable\GCC\ARM_CA9 folder and copy port.c, portASM.S and portmacro.h to the xilinx sdk src folder.
7. Navigate to the - \FreeRTOSV8.2.1\FreeRTOS\Source folder and copy all the six C files to the project.
8. Copy the FreeRTOS headers from the include directory at the same path [7] into the xilinx sdk.
9. Copy heap_4.c from the \FreeRTOSV8.2.1\FreeRTOS\Source\portable\MemMang directory into the project directory.
10. Your Xilinx SDK project src folder should now contains all the files as shown below.
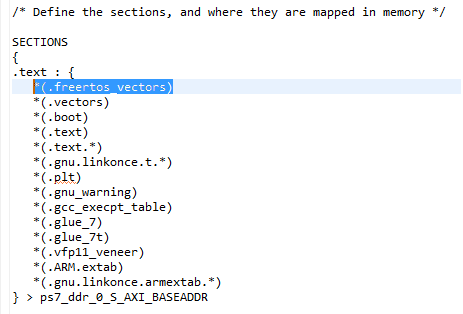
11. The next important thing that needs to be changed is the linker script file - lscript.ld. There is only one new line to be added here as highlighted below.
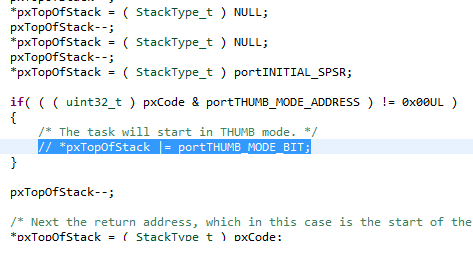
12. I do not want my code to run in thumb mode. Therefore i commented out the line shown below in the function pxPortInitialiseStack present in file port.c. In FreeRTOSConfig.h change the configCPU_CLOCK_HZ macro to 50Mhz.
13. To test it all out i created a simple task that would send the data 0x5, 0xA alternately after a fixed delay to the AXI peripheral thereby displaying the pattern on the zybo leds.
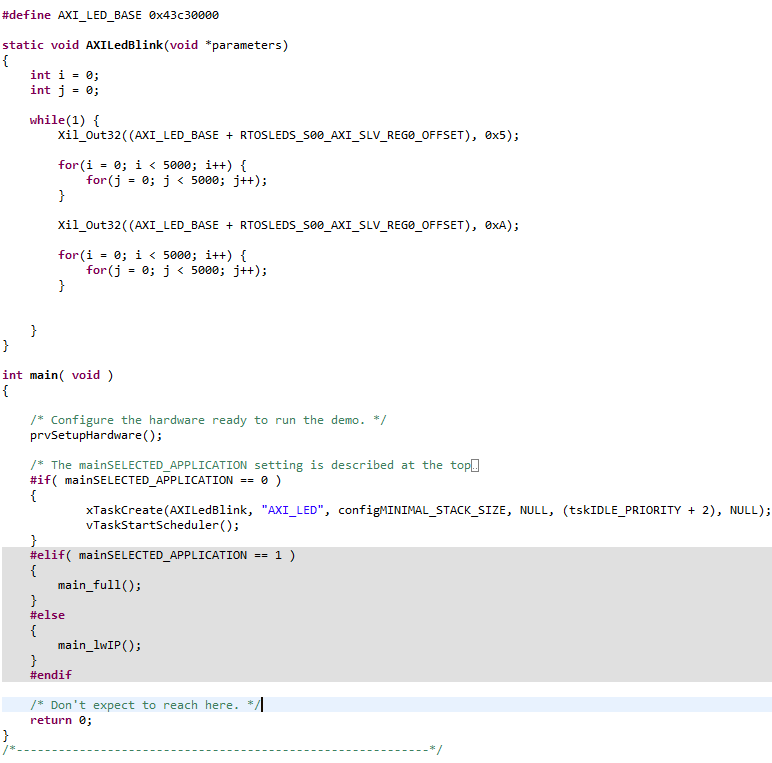
14. The last step is the comment out the call to vParTestInitialise() from the prvSetupHardware function as it is not related to the Zybo board.
15. Well, after the above steps, if everything compiles correctly without errors, program the FPGA and the ELF using the Xilinx Tools menu and start the debug session. Make sure you have the Zybo powered up from the wall adapter and the JP5 header set to JTAG. In my case the USB power did not work as the level shifters were not enabled when i used it.
FreeRTOS on the Digilent Zybo....done...
The entire project on GitHub:
My other FreeRTOS adventures: